RESPIRATOR PROTECTION

Questions? Contact Environment, Health and Safety

Overview

The N95 is the respirator of choice when treating suspected/confirmed Aerosol Transmissible Disease (ATD) or tuberculosis (TB) patients. It may also be assigned as personal protective equipment (PPE) when working with chemotherapy or hazardous medications. 

This type of respirator has a filter-efficiency level of 95% or greater against particulate aerosols free of oil with a respiratory protection factor of 10 when used appropriately. It was designed by a qualified manufacturer and is certified by NIOSH to filter aerosolized particles of 1 micrometer in size. Tight-fitting respirators like the N95 are only effective when the seal around your nose and mouth is tight. If you cannot achieve a proper fit, do not enter the isolation or treatment area.

N95 Use Limitations:

  • The N95 does not supply oxygen. It cannot be worn in an atmosphere containing less than 19.5% oxygen or in environments where contaminant concentrations are immediately dangerous to life and health (organic vapors, toxic gases, and toxic particulates).
  • If the respirator becomes wet, it must be assumed that it is no longer effective and must be replaced.
  • If the respirator is damaged, soiled, or if breathing becomes difficult, leave the contaminated area and dispose of the respirator.
  • The N95 cannot work with beards or other facial hair, or if other conditions exist that prevent a good seal between the face and the edge of the respirator. An alternative is discussed below.
  • Medical clearance by Occupational Health is required prior to fit-testing.
  • Fit-testing for the N95 respirator is required annually.
  • Notify your supervisor that you may need an additional fit test should you experience physical changes that could affect respirator fit. Such conditions include, but are not limited to, facial scarring, dental changes, cosmetic surgery, or an obvious change in body weight.

Alternative: Powered Air-Purifying Respirators (PAPR)

Powered Air Purifying Respirators (PAPR) use a battery-powered pump to provide filtered breathing air. PAPRs provide a higher level of respiratory protection than a disposable mask by providing both a barrier and a positive air current against small and large airborne particles. These respirators remove air contaminants by filtering, absorbing, or chemically reacting with the contaminants as they pass through the respirator canister or cartridge. Air is moved through the filters by a battery-operated pump when used appropriately. PAPRs provide a respiratory protection factor of 25. PAPRs can be cleaned, disinfected, and fitted with new filters for reuse.

This alternative respirator is for use only:

  • Where adequate oxygen (19.5 to 23.5 percent by volume) is available
  • When the wearer is unable to acquire an acceptable fit for the N95 respirator
  • When the wearer’s facial hair prevents a good seal around the N95 respirator

See the Safety Resources tab at http://safety.ucsfmedicalcenter.org/ for guidance documents related to respirators. Please contact EH&S at 476-1300 if you have questions about the Respiratory Protection Program, or if you require additional assistance with respirators not listed in this handout.

Donning Instruction for 3M Aura Health Care Particulate Respirator and Surgical Mask 1870+
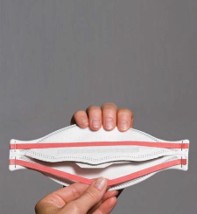
Step One for donning 3M Aura Health Care Particulate Respirator and Surgical Mask 1870+
1. Take the respirator out of its packaging and hold it with the straps facing upward. Tuck the bottom strap beneath the center flaps next to the “ATTENTION” statement.
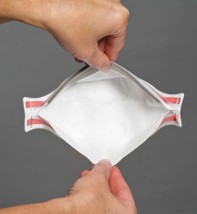
Step two for donning 3M Aura Health Care Particulate Respirator and Surgical Mask 1870+
2. Completely open the top and bottom panels, shaping the nose piece around your thumb at the center of the foam. The straps should separate as the panels are opened. Ensure the bottom panel is fully unfolded and entirely open.
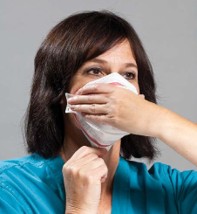
Step Three for donning 3M Aura Health Care Particulate Respirator and Surgical Mask 1870+
3. Position the respirator on your face with the foam resting on your nose and the bottom panel placed securely beneath your chin.
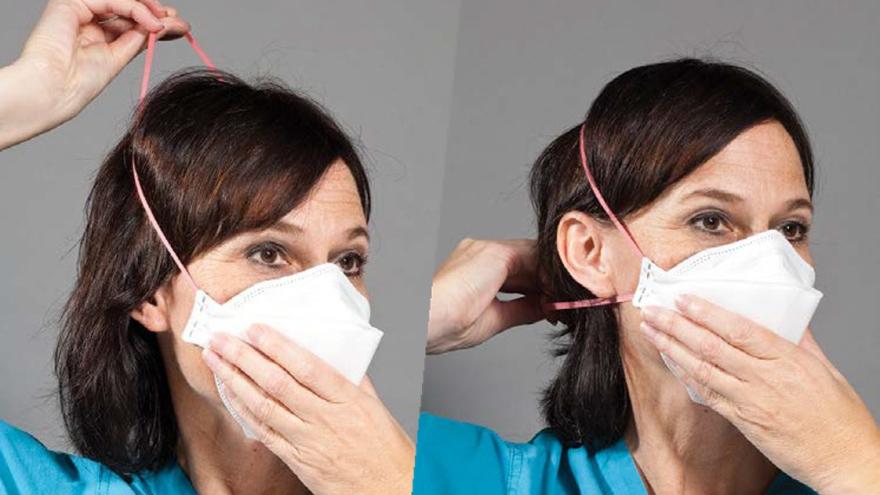
Step four for donning 3M Aura Health Care Particulate Respirator and Surgical Mask 1870+
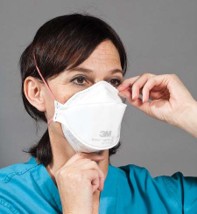
4. Pull the top strap over your head and place it high on the back of your head. Then pull the bottom strap over your head and position it around your neck, below your ears.
Step Five for donning 3M Aura Health Care Particulate Respirator and Surgical Mask 1870+
5. Adjust the respirator for a comfortable fit by pulling the top panel toward the bridge of your nose and positioning the bottom panel securely under your chin. Ensure that hair, facial hair, jewelry, and clothing are not between your face and the respirator, as they can interfere with a proper fit.
Step Six for donning 3M Aura Health Care Particulate Respirator and Surgical Mask 1870+
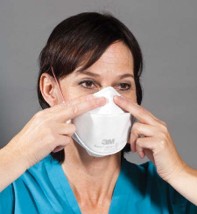
6. Place the fingertips of both hands at the top of the metal nosepiece. Using two hands, shape the nose area to fit your nose by pressing inward and sliding your fingertips down along both sides of the nosepiece.
NOTE: Always use two hands when molding the nosepiece. Using only one hand may cause an improper fit and reduce the respirator’s effectiveness.
Step Seven for donning 3M Aura Health Care Particulate Respirator and Surgical Mask 1870+
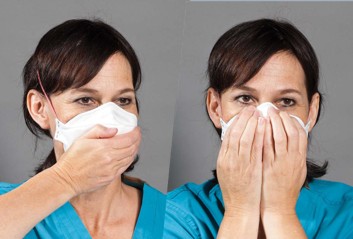
7. Perform a User Seal Check
IT IS IMPORTANT TO USER SEAL CHECK THE RESPIRATOR EVERY TIME YOU WEAR IT.
Place one or both hands fully over the center panel. Inhale and exhale sharply, taking care not to shift the respirator’s position. If you detect air leaking around your nose, readjust the nose piece as described in Step 6. If air leaks around the edges, adjust the panels and reposition the straps to ensure the respirator fits snugly against your face.
If you are unable to achieve a proper seal, do not enter the contaminated area and notify your supervisor.

Removing Instruction for 3M Aura Health Care Particulate Respirator and Surgical Mask 1870+
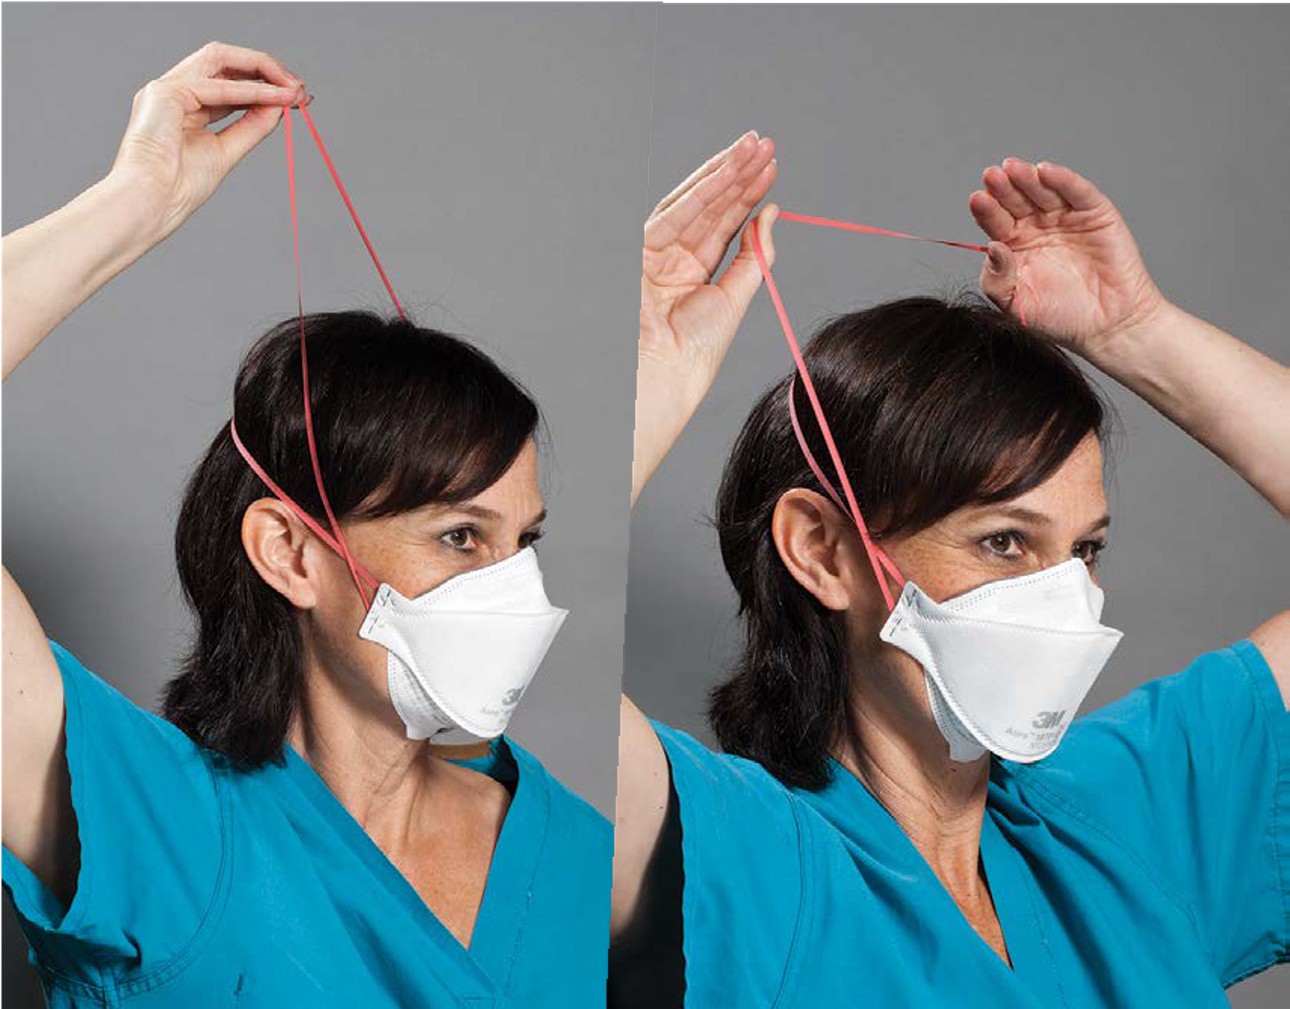
Step one of Doffing a 3M Aura Health Care Particulate Respirator and Surgical Mask
1. Without touching the respirator, carefully lift the bottom strap from around your neck and pull it up and over your head.
Step Two of Doffing a 3M Aura Health Care Particulate Respirator and Surgical Mask 1870+
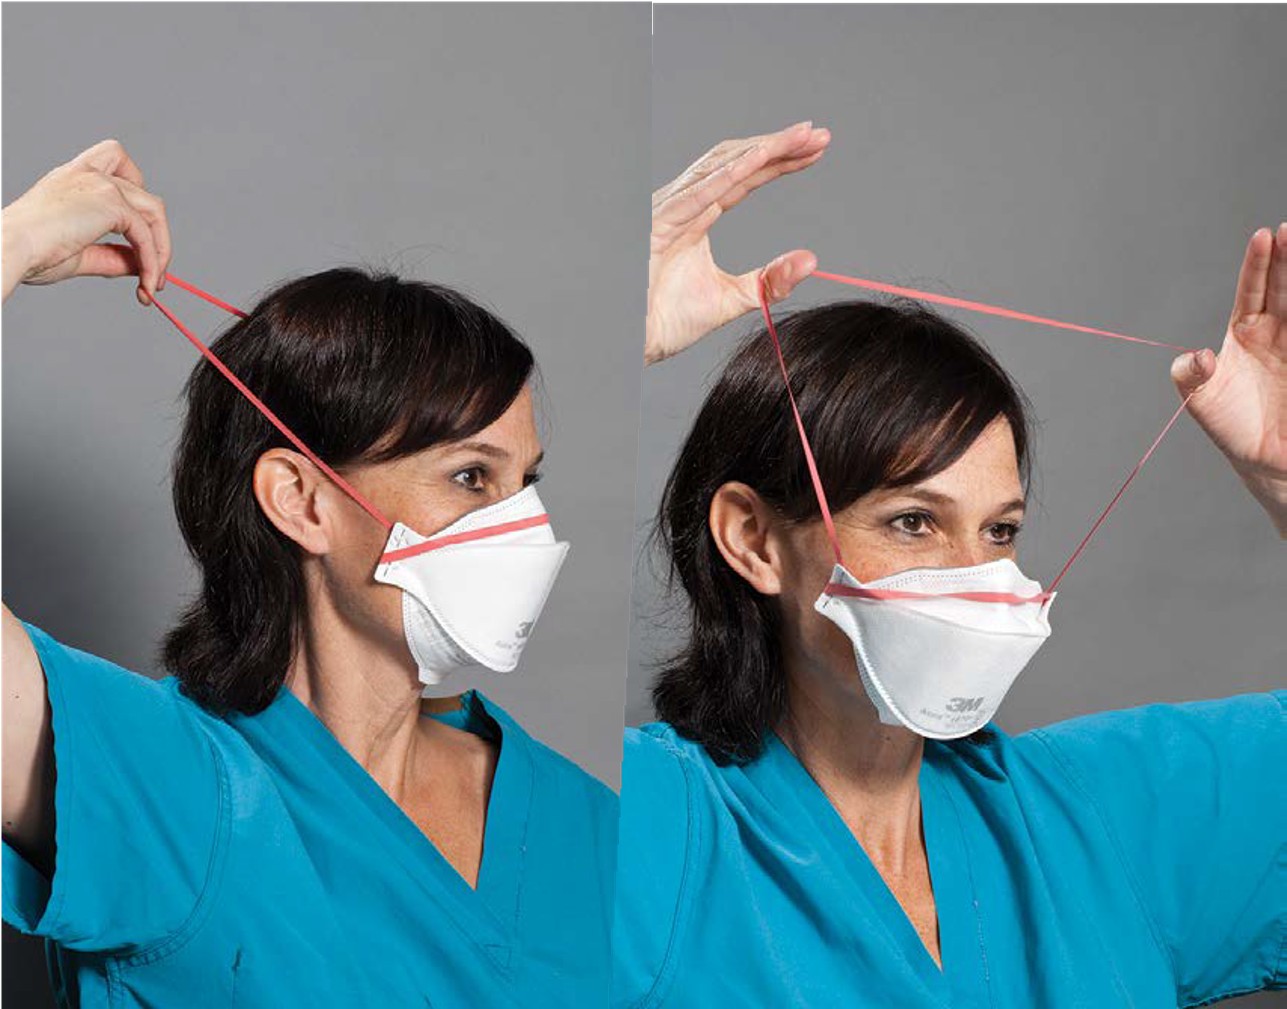
2. Lift the top strap up and over your head.
Avoid touching the respirator.
Step Three of Doffing a 3M Aura Health Care Particulate Respirator and Surgical Mask 1870+
3. Store or dispose of the respirator in accordance with your facility’s infection control policy.

Donning Instructions for 3M Health Care Particulate Respirator and Surgical Mask, 1860/1860S, N95
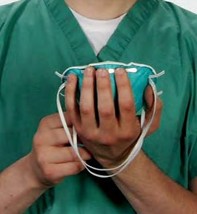
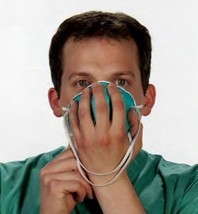
Step one of Donning Instructions for 3M Health Care Particulate Respirator and Surgical Mask, 1860/1860S, N95
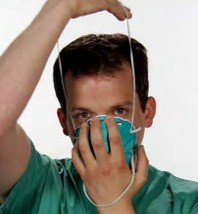
1. Hold the respirator in your hand with the nosepiece resting at your fingertips, and let the head straps hang freely beneath your hand.
Step two of Donning Instructions for 3M Health Care Particulate Respirator and Surgical Mask, 1860/1860S, N95
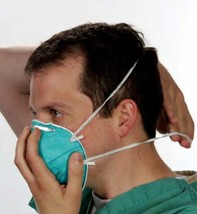
2. Place the respirator beneath your chin with the nosepiece facing upward.
Step three of Donning Instructions for 3M Health Care Particulate Respirator and Surgical Mask, 1860/1860S, N95
3. While keeping the respirator in position, lift the top strap over your head and place it high on the back of your head.
Step four of Donning Instructions for 3M Health Care Particulate Respirator and Surgical Mask, 1860/1860S, N95
4. Continue holding the respirator securely in place as you pull the bottom strap over your head
and position it around your neck, below your ears. Make sure the straps are not twisted. Adjust the respirator so it sits low on your nose.
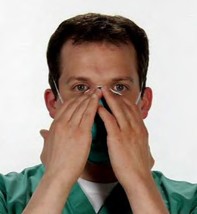
Step five of Donning Instructions for 3M Health Care Particulate Respirator and Surgical Mask, 1860/1860S, N95
5. Using both hands, shape the nosepiece to fit your nose by pressing inward and sliding your fingertips down along both sides.
NOTE: Always use two hands to mold the nosepiece. Using only one hand may lead to an improper fit and reduce the respirator’s effectiveness.
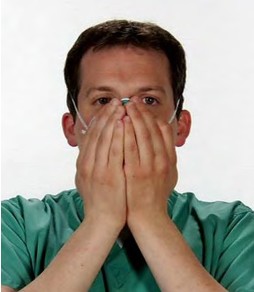
Step six of Donning Instructions for 3M Health Care Particulate Respirator and Surgical Mask, 1860/1860S, N95
6. Perform a User Seal Check IT IS IMPORTANT TO USER SEAL CHECK THE RESPIRATOR EVERY TIME YOU WEAR IT. To perform the user seal check, place both hands fully over the respirator without shifting its position and exhale sharply. If you feel air leaking around your nose, readjust the nosepiece as described in Step 5. If air leaks around the edges of the respirator, reposition the straps along the sides of your head. Repeat the seal check after making any adjustments. If you are unable to achieve a proper fit, notify your supervisor. Do not enter any area that requires respirator use.


Removal Instructions for 3M Health Care Particulate Respirator and Surgical Mask, 1860/1860S, N95
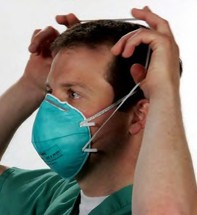
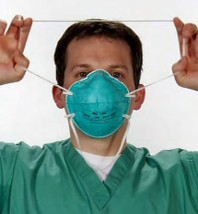
Step one of Removing Instructions for 3M Health Care Particulate Respirator and Surgical Mask, 1860/1860S, N95
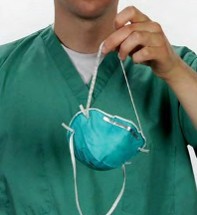
1. Without touching the respirator, carefully lift the bottom strap from around your neck and pull it up and over your head.
Step two of Removing Instructions for 3M Health Care Particulate Respirator and Surgical Mask, 1860/1860S, N95
2. Lift the top strap up and over your head. Avoid touching the respirator.
Step three of Removing Instructions for 3M Health Care Particulate Respirator and Surgical Mask, 1860/1860S, N95
3. Store or dispose of the respirator in accordance with your facility’s infection control policy.

DONNING INSTRUCTIONS FOR HALYARD N95 PARTICULATE RESPIRATORS
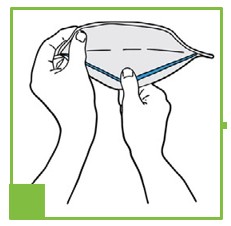
Step one of DONNING INSTRUCTIONS FOR HALYARD N95 PARTICULATE RESPIRATORS
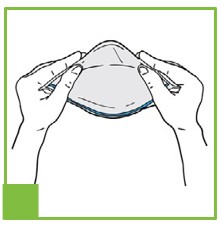
1. Pull the edges of the respirator apart to open it completely.
Step two of DONNING INSTRUCTIONS FOR HALYARD N95 PARTICULATE RESPIRATORS
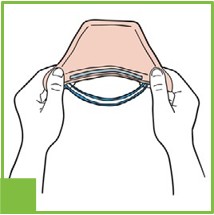
2. Gently shape the nose wire into a slight curve
Step three of DONNING INSTRUCTIONS FOR HALYARD N95 PARTICULATE RESPIRATORS
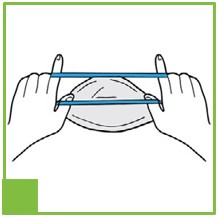
3. Turn the respirator upside down so the two headbands are visible.
Step four of DONNING INSTRUCTIONS FOR HALYARD N95 PARTICULATE RESPIRATORS
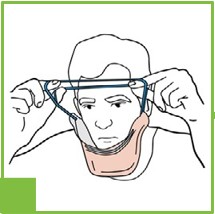
4. Use your index fingers and thumbs to pull the two headbands apart.
Step five of DONNING INSTRUCTIONS FOR HALYARD N95 PARTICULATE RESPIRATORS
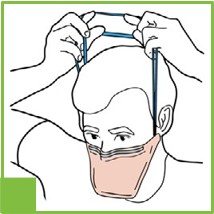
5. Keep holding the headbands with your index fingers and thumbs, and place the respirator under your chin so it cups your face.
Step six of DONNING INSTRUCTIONS FOR HALYARD N95 PARTICULATE RESPIRATORS
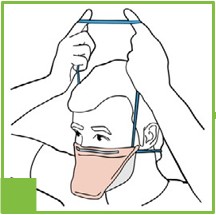
6. Lift the headbands and pull them up and over your head.
Step seven of DONNING INSTRUCTIONS FOR HALYARD N95 PARTICULATE RESPIRATORS 7
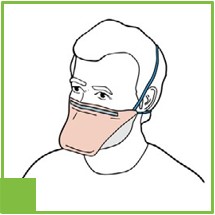
7. Let go of the lower headband with your thumbs and place it at the base of your neck.
Step eight of DONNING INSTRUCTIONS FOR HALYARD N95 PARTICULATE RESPIRATORS
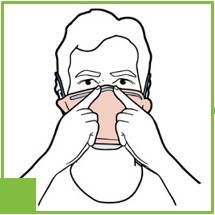
8. Place the remaining headband on the top of your head.
Step nine of DONNING INSTRUCTIONS FOR HALYARD N95 PARTICULATE RESPIRATORS
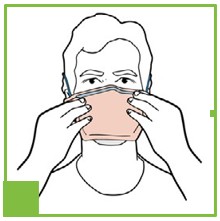
9. Press firmly with your fingers to mold the nosepiece to the bridge of your nose.
Step ten of DONNING INSTRUCTIONS FOR HALYARD N95 PARTICULATE RESPIRATORS
10. Keep adjusting the respirator and securing the edges until it feels snug and properly fitted to your face. Then, perform a user seal check.


DIRECTIONS FOR USER SEAL CHECKING

IT IS IMPORTANT TO USER SEAL CHECK THE RESPIRATOR EVERY TIME YOU WEAR IT.

Breathe in and out forcefully several times. The respirator should pull inward slightly as you inhale and expand as you exhale. You should not feel any air leaking between your face and the respirator.

If the respirator does not move in and out as described, or if you feel air leaking around the edges, the fit is not adequate. Readjust the respirator until the seal is secure and you can successfully complete the user seal check.